How to Rip CD Music
If you have an extensive music CD collection you can easily rip those CDs and make them available to stream from your Plex server.
This guide will provide the steps you can take to make bit-perfect, verified copies of your music so you don't have to do it again.
One caveat, though, is this guide will use a free application that is only available for Windows. I have read that the application does work with Wine on Linux.
With that note, let's get started.

This article is divided into multiple sections. The sections are as follows:
- Requirements
- The hardware and software requirements for ripping a music CD.
- Configuring Exact Audio Copy
- Configuring the software properly to get bit-perfect music copies from a music CD. This setup will need to be done only once.
- Ripping a music CD with Exact Audio Copy
- The steps needed to copy music tracks from a CD to files that can be streamed by your Plex server.
Requirements
There aren't many requirements needed for ripping CD music. You will need an optical drive and software that can copy the music tracks from the CD. Both are briefly explained below.
Hardware
There aren't any special hardware requirements for ripping music from a CD. Any optical disc drive will work. You can easily use the same drive you do for ripping your Blu-ray movies.
Software
As for software, we will be using Exact Audio Copy. It is free and can provide bit-perfect ripping of your music. It can download the metadata, including cover art, for your music and then save them as a compressed file that is ready for Plex to stream.
Configuring Exact Audio Copy
- Download and install Exact Audio Copy to your computer. During the installation, you can deselect the GD3 Metadata Plugin as it is a commercial plugin that won't be used for ripping music from a CD.
- Once EAC is installed, you may get the following popup message if you do have the GD3 Metadata Plugin installed:
The test version of the GD3 metadata provider was installed together with EAC. Do you want to use the 10 album lookups test version as the current metadata provider?
Click the No button to close the popup and continue.
- When starting Exact Audio Copy for the first time, the Welcome window will be shown. Click the Cancel button to close the window as we will be setting up the application manually.
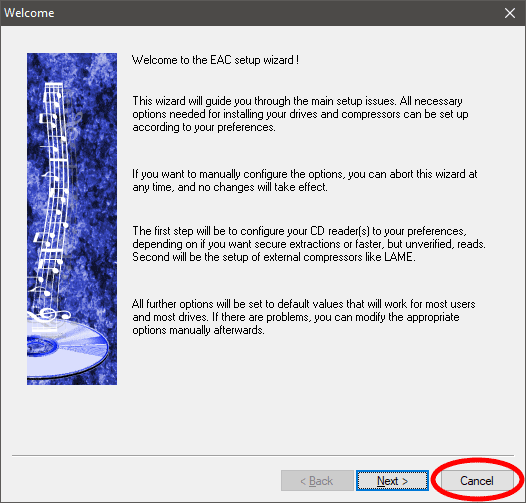
Exact Audio Copy - Welcome window
Calibrate AccurateRip
When running EAC for the first time, you may need to calibrate the AccurateRip plugin. To do so, use the following steps:
- Make sure the correct optical drive is selected in the dropdown in the upper-left corner of Exact Audio Copy and then insert a music CD. The AccurateRip popup should be displayed on the screen. If not, try another music CD until it appears.
- From the AccurateRip popup, click the Configure button.
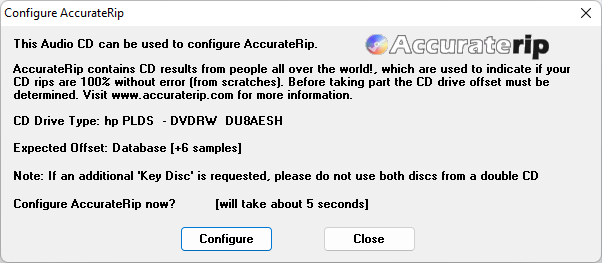
Exact Audio Copy - AccurateRip configure window - If the configuration was successful, you will see the "Congratulations" popup. Click the OK button to close this popup.
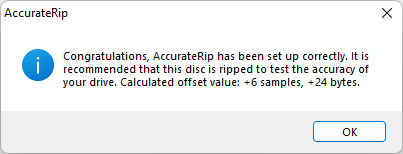
Exact Audio Copy - AccurateRip Setup Correctly window
Once AccurateRip has been configured, you will see the AccurateRip logo below the track list in EAC in the lower-right corner.
Setting Exact Audio Copy Options
With the AccurateRip configuration completed, the next step is to configure the settings in Exact Audio Copy to get a bit-perfect, compressed file for each track of a CD. All settings discussed below will only need to be set once for all your music CDs.
EAC options
- Click EAC->EAC Options... from the menu.
- Click the Extraction tab.
- Do the following:
- Check the Fill up missing offset samples with silence option.
- Check the Synchronize between tracks option.
- Select High for the Error recovery quality option.
Leave everything else as default.
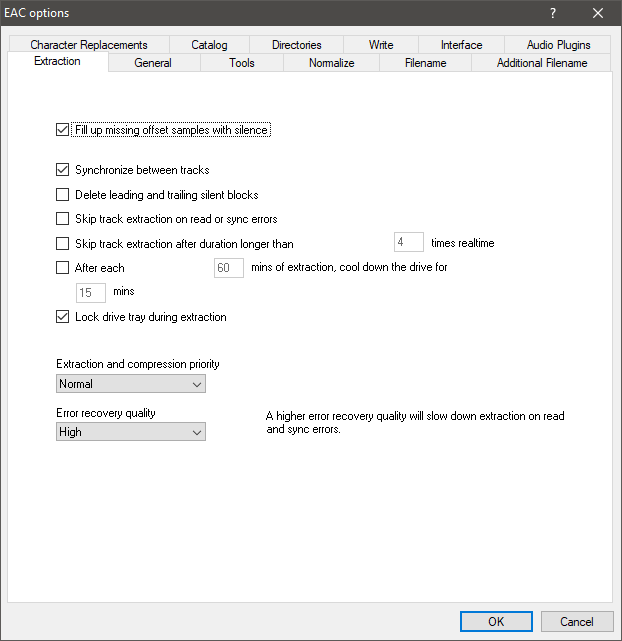
Exact Audio Copy - EAC options extraction tab settings - Click the General tab.
- Set the following:
- Check the Use alternate CD play routines option.
- Check the Disable 'CD Autostart' for audio and data CDs while EAC running option.
- Check the On unknown CDs, Select: automatically access online metadata database option.
- Check the Create log files always in english language option.
Leave everything else as default.
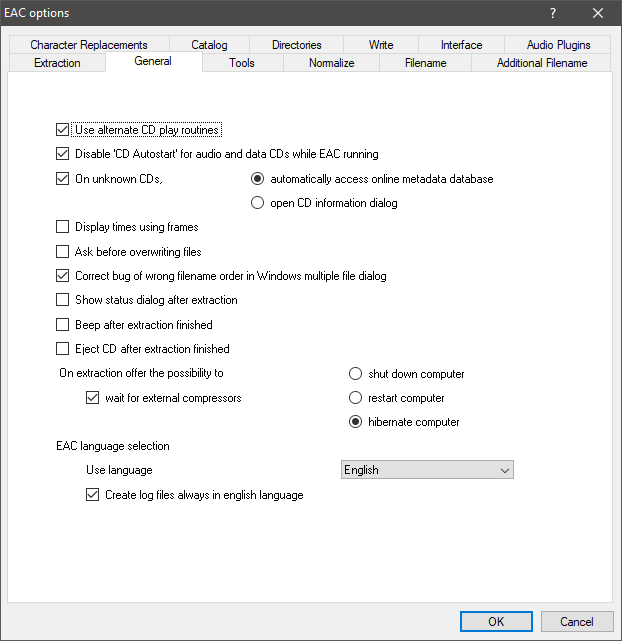
Exact Audio Copy - EAC options general tab settings - Click the Tools tab.
- Set the following:
- Check the Retrieve UPC / ISRC codes in CUE sheet generation option.
- Check the Use CD-Text information in CUE sheet generation (Default) option.
- Check the Automatically write status report after extraction option.
- Check the Append checksum to status report option.
- Check the Convert BMP image files automatically to JPG (Default) option.
- Don’t check the On extraction, start external compressors queued in the background (Default) option.
- Don’t check the Activate beginner mode, disable all advanced features (Default) option.
Leave everything else as default.
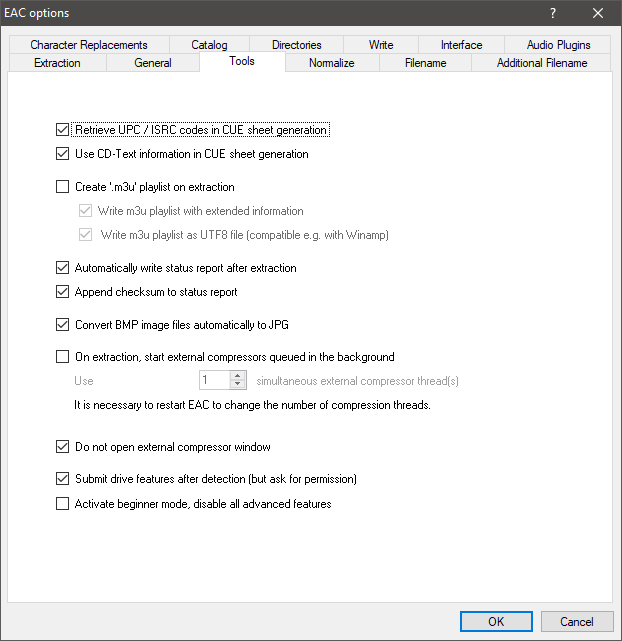
Exact Audio Copy - EAC options Tools tab settings - Click the Normalize tab.
- Set the following:
- Don't check the Normalize option.
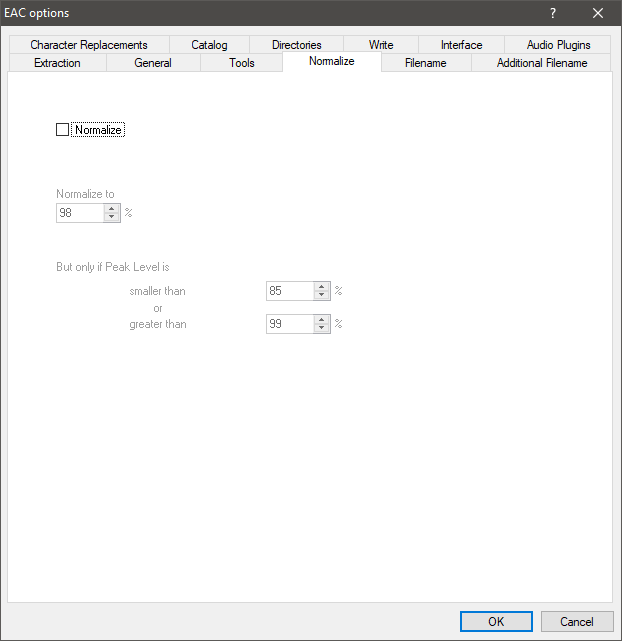
Exact Audio Copy - EAC options normalize tab settings - Click the Filename tab.
- Set the following:
- Set the Naming scheme to:
%albumartist%\%albumtitle%\%tracknr2% %title%
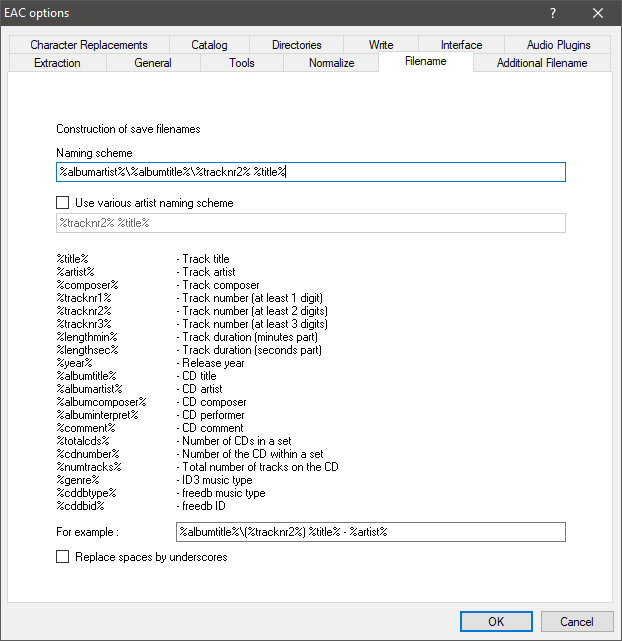
Exact Audio Copy - EAC options filename tab settings - Set the Naming scheme to:
- Click the Directories tab.
- Set the following:
- Click Browse and select the folder associated with the Plex music library
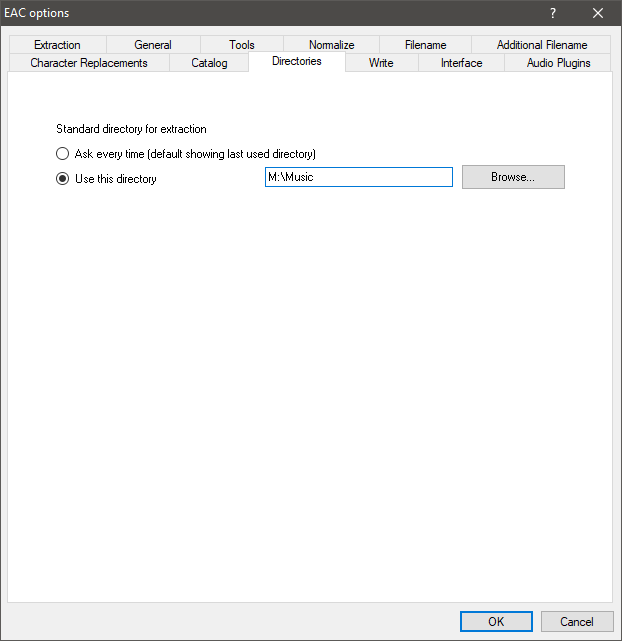
Exact Audio Copy - EAC options directories tab settings - Click the OK button to save the changes.
Drive options
- Click EAC->Drive Options... from the menu.
- Click the OK button on the information message.
- Click the Extraction Method tab.
- Click the Detect Read Features button and then wait for the test to complete and make a note of the results.
- Click the OK button to close the analysis results window - don't click the Apply button.
- Set the following:
- Select Secure mode with following drive features (recommended) option.
- Check the Drive has 'Accurate Stream' feature option (if detected by test).
- Check the Drive caches audio data option (if detected by test).
- Uncheck the Drive is capable of retrieving C2 error information option. This may not be a reliable function on many drives.
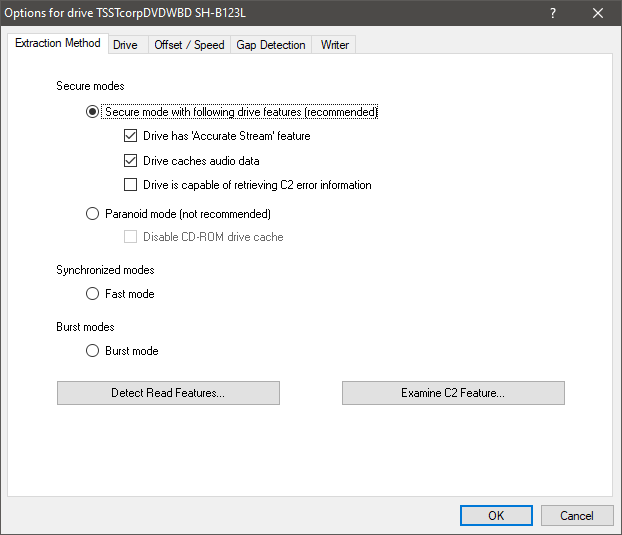
Exact Audio Copy - drive options extraction method tab settings - Click the Drive tab.
- Click the Autodetect read command now button.
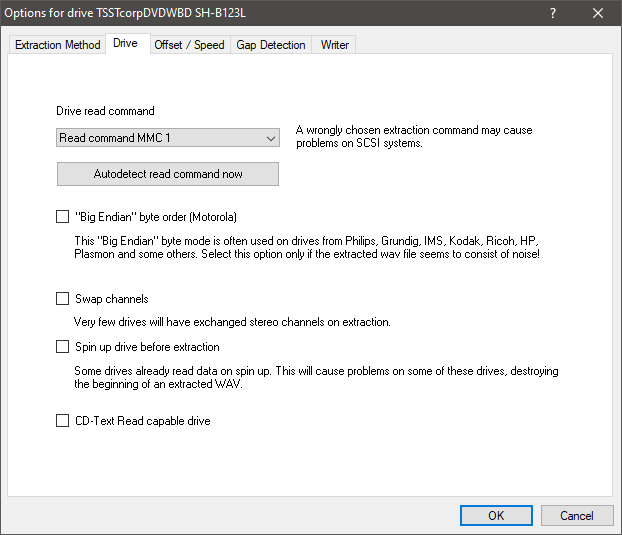
Exact Audio Copy - drive options drive tab settings - Click the Offset / Speed tab
- Set the following:
- Uncheck the Overread into Lead-In and Lead-Out option.
- Check the Allow speed reduction during extraction option.
- Check the Use AccurateRip with this drive option.
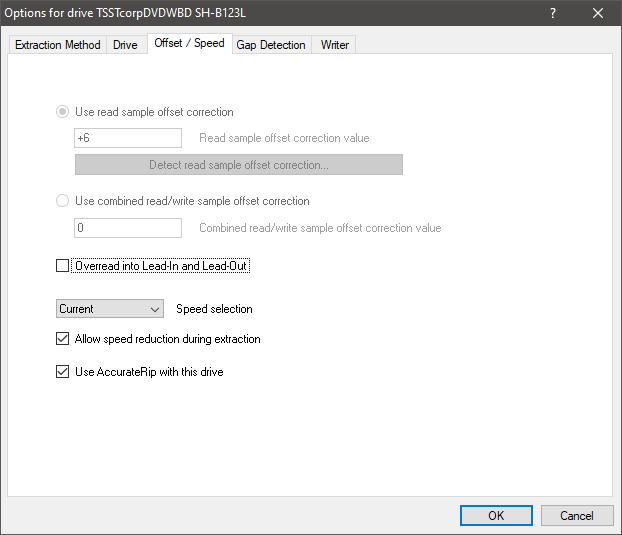
Exact Audio Copy - drive options offset / speed tab settings - Click the Gap Detection tab
- Set the following:
- Select the Detection method A for the Gap/Index retrieval method option.
- Select the Secure for the Detection accuracy option.
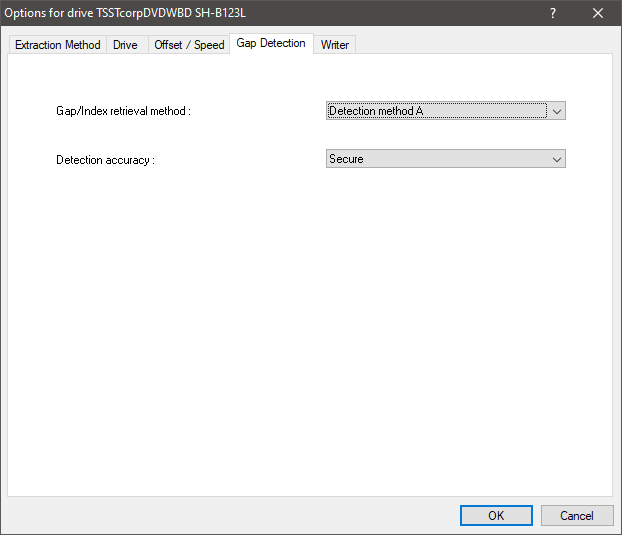
Exact Audio Copy - drive options gap detection tab settings - Click the OK button to save the changes.
Compression options
- Click EAC->Compression Options... from the menu.
- Click the External Compression tab.
- Set the following:
- Check the Use external program for compression option.
- Select the User Defined Encoder for the Parameter passing scheme option.
- Enter .flac for the Use file extension option.
- Select the flac.exe included with EAC under the FLAC folder in the EAC installation folder.
- In Additional command-line options, enter:
-8 -V -T "ARTIST=%artist%" -T "TITLE=%title%" -T "ALBUM=%albumtitle%" -T "DATE=%year%" -T "TRACKNUMBER=%tracknr%" -T "GENRE=%genre%" -T "PERFORMER=%albuminterpret%" -T "COMPOSER=%composer%" %haslyrics%--tag-from-file=LYRICS="%lyricsfile%"%haslyrics% -T "ALBUMARTIST=%albumartist%" -T "DISCNUMBER=%cdnumber%" -T "TOTALDISCS=%totalcds%" -T "TOTALTRACKS=%numtracks%" -T "COMMENT=%comment%" %source% -o %dest%
- Check the Delete WAV after compression option.
- Check the Use CRC check option.
- Uncheck the Add ID3 tag option.
- Check the Check for external programs return code option.
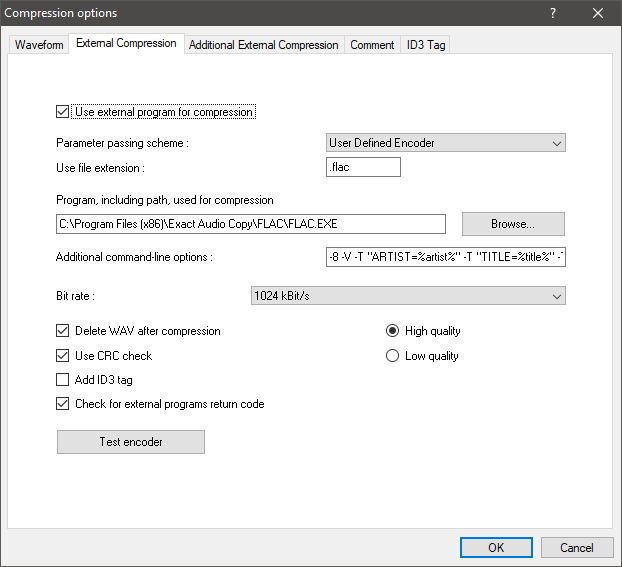
Exact Audio Copy - compression options external compression tab settings - Click the ID3 Tag tab.
- Set the following:
- Uncheck all options.
- Check the Write cover image into extraction folder option.
- Enter cover in the Naming scheme field.
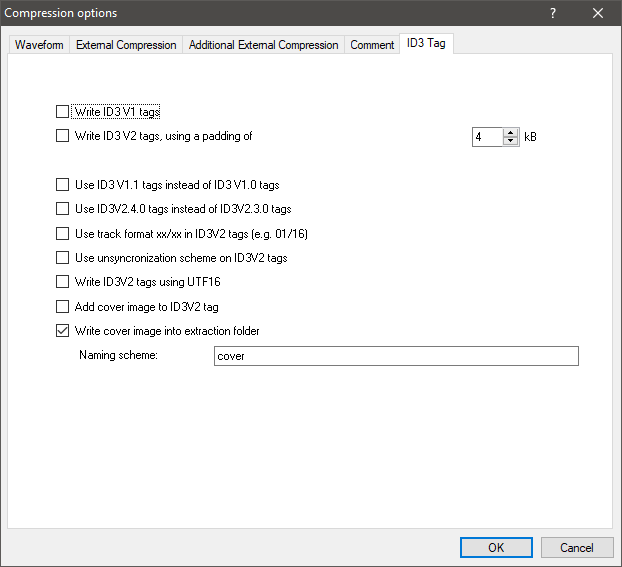
Exact Audio Copy - compression options ID3 tag tab settings - Click the OK to save the changes.
Metadata options
- Click EAC->Metadata Options... from the menu.
- Select CUETools DB Metadata Plugin V2.2.6 (or newer) for the Selected metadata provider option.
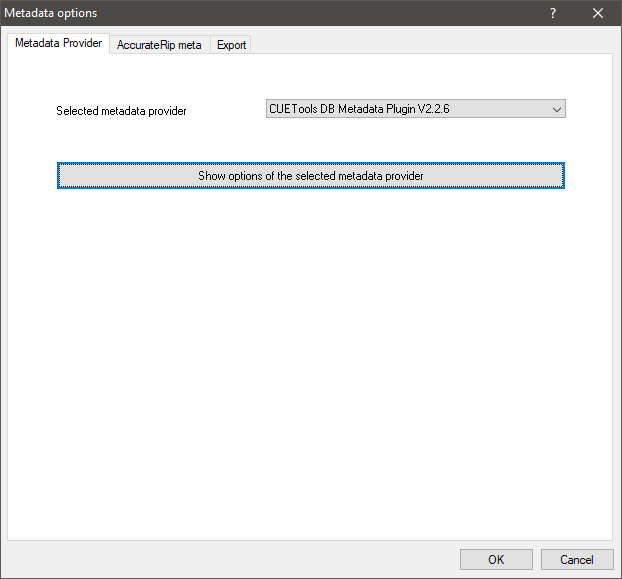
Exact Audio Copy - compression options ID3 tag tab settings - Click the Show options of the selected metadata provider button.
- Set the following:
- Select Extensive for the Metadata search mode option.
- Select Primary for the Covers search mode option.
- Select Large for the Covers size option.
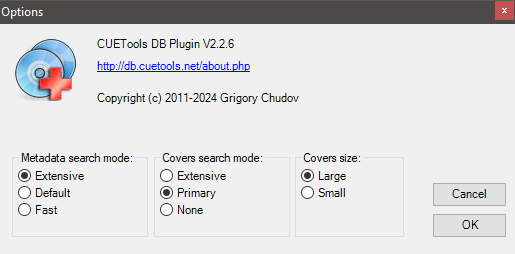
Exact Audio Copy - CUETools DB Plugin options - Click the OK button on the popup
- Click the OK to save the changes.
Ripping a music CD with Exact Audio Copy
Once EAC has been configured properly, you can then start to copy the music from a CD. There are more steps to perform than in other applications, however, you will get great results by following the steps.
The following steps will need to be repeated for each music CD.
Metadata
Before ripping a CD, it is important to first download the metadata for the album.
- Start Exact Audio Copy, if it isn't running, and then insert a music CD.
- In the toolbar, click the logo with the two CDs and a plus sign, and select CUETools DB Metadata plugin V2.2.6 or newer.
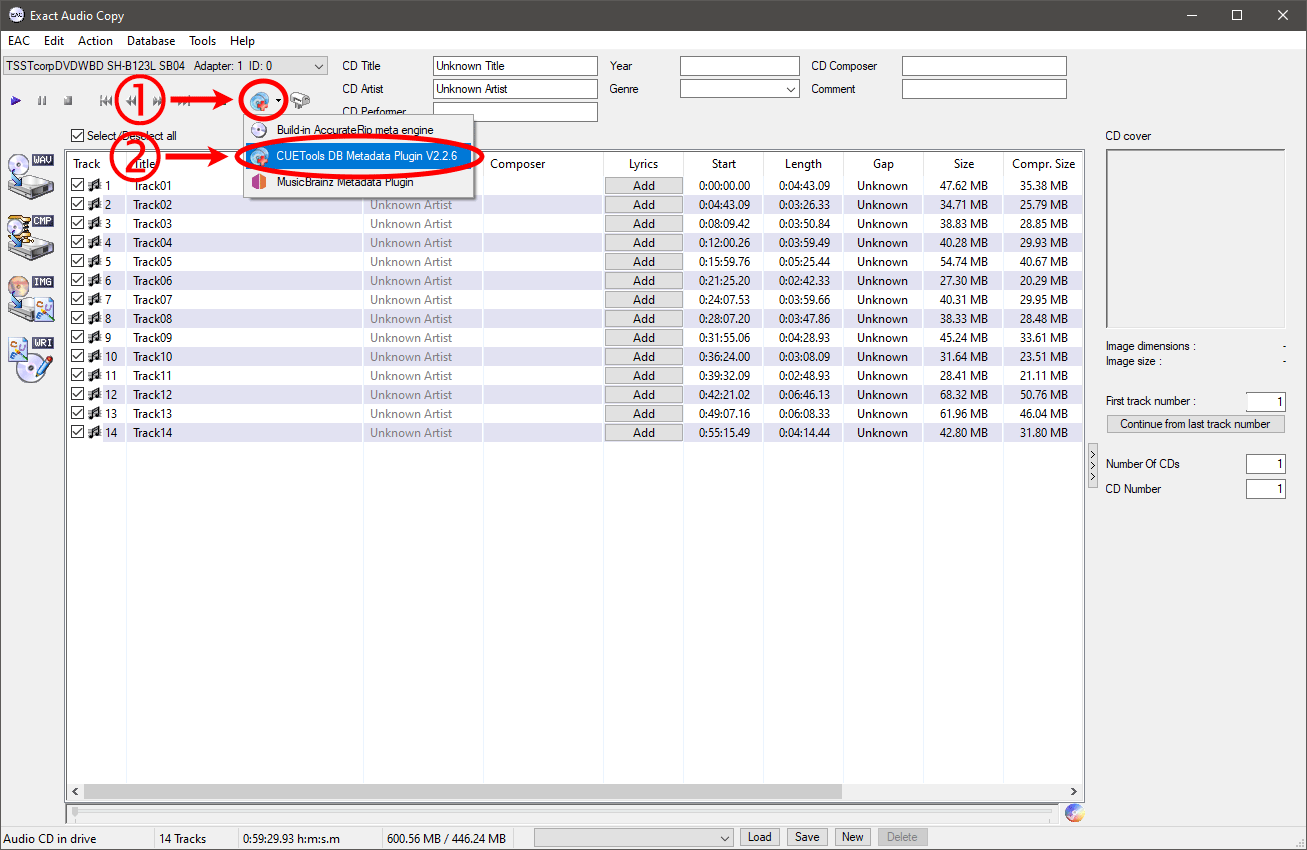
Exact Audio Copy - get CD information from the metadata provider - Click the Yes button on the warning.
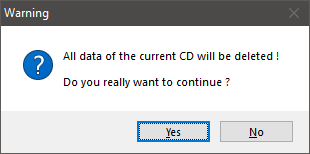
Exact Audio Copy - current CD data will be deleted warning - From the CTDB Metadata Lookup select the best match for the CD. You can match the ID found at the end of each of the options to the ID on either the CD or the CD cover. Select the cover you would like to include (try to select one that is large) and then click the OK button.
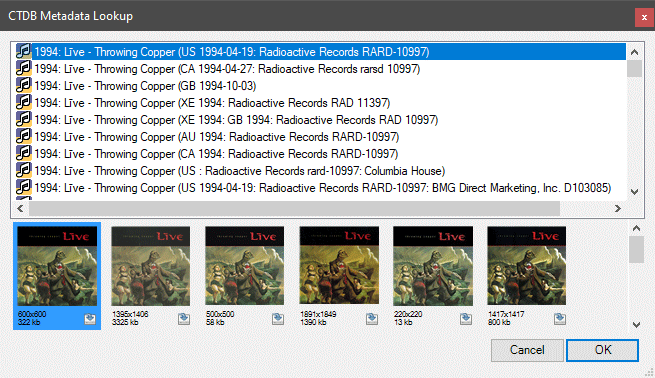
Exact Audio Copy - CTDB metadata lookup Manually check that the metadata downloaded is correct. You can manually edit it in the EAC window if needed.
Detect gaps
To ensure that the copy of each track is accurate, it is important to have EAC detect any gaps between tracks on the CD. To detect gaps, use the following steps:
- Click the Action menu and verify that Append Gaps To Previous track (default) is checked. If it isn't, check it.
- Click the Action->Detect Gaps menu option. Wait for the analysis to complete and once done, the Gap fields should change from "Unknown" to a timestamp.
Create a CUE sheet (optional)
If you would like to later burn a CD using the ripped files, you can create a CUE sheet. A CUE sheet is a small text file that stores information about how and where the tracks should be written.
A CUE sheet is not required for ripping a CD or streaming the tracks from Plex, but it can be done quickly in Exact Audio Copy.
To create a CUE sheet, do the following:
- Click the Action->Create CUE Sheet->Multiple WAV Files With Gaps... (Noncompliant) menu option. Wait for the analyzing window to complete.
Extract and compress
The final step is to perform the actual ripping of the audio tracks from the CD. The option we will use will be to first test the track, copy the data, and then compress the file to make it smaller without losing any quality.
To do this, use the following steps:
- Click the Action->Test & Copy Selected Tracks->Compressed... menu option.
- The Extracting Audio Data window is displayed which shows the progress of the extraction. It could take a long time to extract the audio tracks depending on the length and condition of the album. Once done, click the OK button.
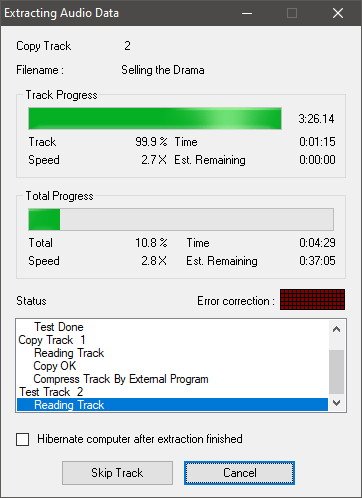
Exact Audio Copy - extracting audio data
Once the entire process is finished, you will see all the album tracks in the folder in the FLAC format along with the log file and cover art of the album. If you did create a CUE sheet, there will also be a CUE file in the folder.
You should verify the rip of each audio track. One method is to simply stream the tracks from Plex. Also, you should open the log file that is generated to see if any errors were reported. If there are errors, the log file will report which track may contain errors, so you should probably listen to that track to determine how the errors affect the audio.
If you set up Plex to use the embedded metadata from your music files then Plex will read the metadata, including the cover art, from your FLAC files and folder and display that information to your users.